

Home & Garden

The Annual Home Systems Walkthrough Every Homeowner Should Do

Share
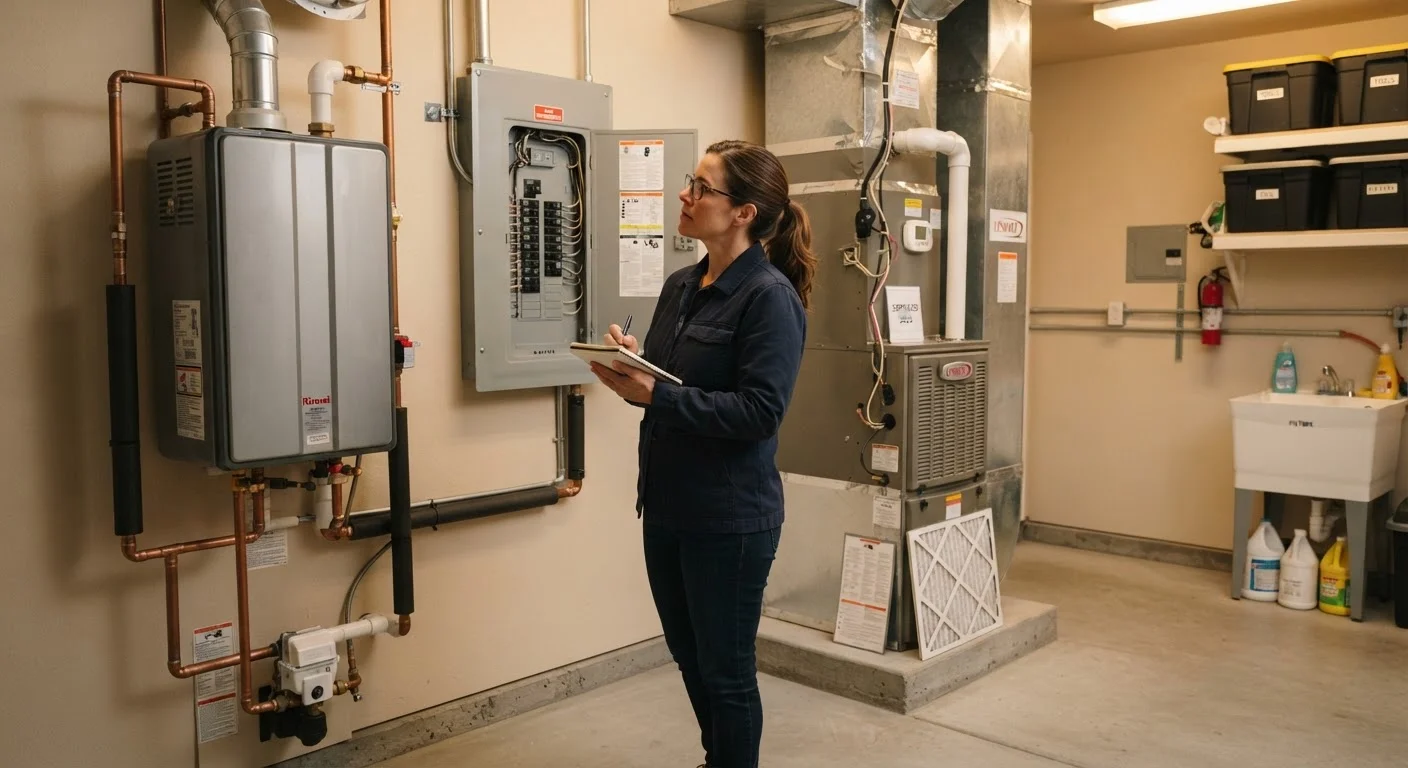
Homeowner examining home utility room with water heater, electrical panel, and HVAC system

Key Takeaways

A yearly home systems walkthrough helps catch small problems before they become expensive failures.
HVAC filters, water heater sediment, and electrical panels each have distinct warning signs any homeowner can learn to spot.
Knowing where your shutoffs are located is essential safety knowledge every household member should have.
Some checks are observational only — licensed professionals should handle electrical, gas, and structural concerns.
Documenting findings each year creates a maintenance history that supports informed repair decisions.
60–120 min

Summary

22 items · 1–2 hours

Why an Annual Walkthrough Pays for Itself

Most home systems are designed to run quietly in the background — until they don't. HVAC units, water heaters, electrical panels, and plumbing shutoffs rarely announce trouble before the problem is already expensive. A structured annual walkthrough changes that dynamic by giving you a consistent baseline: you learn what normal looks and sounds like, so deviations become obvious early.

Think of this as the home equivalent of a check-up — not a repair session, but an informed inspection. You won't fix everything yourself, and some findings will warrant a call to a licensed professional. That's the point. Catching a corroded anode rod before your water heater floods a basement, or spotting a tripped breaker pattern before it worsens, is far less costly than emergency repairs. As our companion piece on deferred maintenance on home systems documents, neglect compounds quickly.

Set aside one to two hours annually — many homeowners tie this to a seasonal transition, such as early fall before heating season begins. Bring a flashlight, a notepad or phone for photos, and this checklist.

Required

Flashlight or headlamp

Illuminate dark utility rooms, panel interiors, crawlspaces, and under-sink cabinets during inspection.

Required

Notepad or smartphone

Record findings, take photos of any concerns, and document component ages or model numbers.

Required

Replacement air filters (sized to your unit)

Swap out the existing filter immediately if it's dirty, rather than scheduling a separate trip.

Optional

Non-contact voltage tester

Confirm circuits are de-energized before any contact near wiring — for informational observation only, not repair work.

Optional

Bucket and garden hose adapter

Drain a small volume from the water heater drain valve to check for sediment buildup.

How to Use This Checklist

Work through each system group in order. For each item, your job is to observe, document, and flag — not necessarily to repair on the spot. Note anything unusual: sounds, smells, visible corrosion, discoloration, or components that appear aged or damaged. Items marked must are non-negotiable annual tasks. Items marked should are strongly recommended. Nice-to-have items add depth if you have the time.

If you're unfamiliar with what you're seeing at your electrical panel, our article on reading your electrical panel explains breakers, amperage, and warning signs in plain language. For any work that results from this walkthrough, knowing the right questions to ask contractors will help you evaluate scope and credentials before authorizing repairs.

Stop and Call a Professional for These Findings

If you detect a burning or acrid smell near the electrical panel, see scorching or melted insulation on any wire, smell gas near the water heater or furnace, or find standing water near any electrical component — stop the inspection immediately. Do not attempt further investigation yourself. Contact a licensed electrician, plumber, or your gas utility as appropriate. These conditions carry serious safety risks and require qualified intervention.

HVAC System

Replace or inspect air filters — most 1-inch filters should be changed every 1–3 months, but check manufacturer guidance for your specific unit. Must
Visually inspect the outdoor condenser unit for debris, bent fins, or vegetation growing within two feet of the cabinet. Must
Turn on heating and cooling modes briefly to confirm the system responds, reaches temperature, and shuts off cleanly. Must
Inspect accessible ductwork for visible tears, disconnected joints, or signs of pest intrusion. Should
Schedule a professional tune-up if the system hasn't had one in over a year or if you notice unusual cycling, odors, or uneven heating and cooling. Should
Test carbon monoxide detectors on the same floor as fuel-burning heating equipment. Must

Water Heater

Visually inspect the unit for corrosion, rust staining, pooled water, or mineral buildup around connections and the base. Must
Check the temperature pressure relief (TPR) valve for signs of leakage or corrosion — do not manually test it unless you're prepared for it to stick open and have a licensed plumber available. Must
Flush a small amount of water from the drain valve to check for heavy sediment; if the water runs murky or brown, schedule a professional flush. Should
Confirm the thermostat is set between 120°F and 140°F — 120°F is the general recommendation for most households to balance safety and energy use. Should
Note the unit's age; most traditional tank water heaters have a serviceable lifespan of 8–12 years. Nice to have

Electrical Panel

Open the panel door and look for any breakers in a tripped position (typically a middle or slightly off position); reset cautiously and note if it trips again. Must
Check for any signs of scorching, burning odor, or corrosion inside the panel — if present, do not touch anything further and contact a licensed electrician immediately. Must
Confirm the panel is labeled accurately so every circuit is identifiable — update labels if they're blank or inaccurate. Should
Review GFCI outlets in kitchens, bathrooms, garages, and exterior areas by pressing the test and reset buttons to confirm they function correctly. Must
Review AFCI breaker protection if your panel has been updated — consult our companion article on electrical safety concepts for context. Nice to have

Plumbing Shutoffs and Visible Pipes

Locate and manually operate the main water shutoff valve to confirm it moves freely and fully stops flow — a stuck valve during an emergency can be catastrophic. Must
Check under sinks and around toilets for slow drips, staining, or soft cabinet floors that may indicate a slow leak. Must
Inspect exposed pipes in the basement, crawlspace, or utility room for corrosion, joint leaks, or insulation gaps that could cause freezing. Should
Test all drain stoppers and note any that are sluggish — slow drains often indicate early blockages that are inexpensive to clear. Should
Locate the individual shutoff valves for major fixtures (toilets, dishwasher, washing machine) and confirm they operate smoothly. Should
Document shutoff locations in your maintenance log so all household members can find them quickly in an emergency. Must

After the Walkthrough: What to Do With Your Findings

Once you've completed the checklist, sort your notes into three buckets: items to address yourself now (such as replacing an air filter), items to schedule with a professional, and items to monitor and re-check in six months. Don't let the middle bucket sit — deferred professional work is where small issues quietly compound.

Keep a written or digital log of each year's findings alongside any invoices or repair records. This maintenance history is genuinely useful: it helps contractors diagnose problems faster, supports warranty claims, and provides documentation if you ever sell the home. Understanding your plumbing layout can also simplify the walkthrough year over year — our room-by-room plumbing reference is a useful companion. Finally, make sure every adult in your household knows where the main water, gas, and electrical shutoffs are located — our guide on shutting off every utility before an emergency covers this step by step.

Permits and Codes Apply to Repair Work

This checklist is an observational audit, not a repair guide. If your findings lead to repair or replacement work — especially on electrical, gas, or plumbing systems — many of those jobs require permits and licensed contractors under local building codes. Skipping permits can create liability issues and complicate home sales. Always verify local requirements before authorizing significant work.

Home & Garden Editorial Team is the collective byline for our editorial team and contributor network. Articles published under this byline or an editorial pen name are researched, written, and reviewed according to our editorial standards for clarity, consistency, and independence before publication.

View all articles by Home & Garden Editorial Team →
Disclaimer: The content on this site is provided for informational purposes only and should not be considered a substitute for professional advice. While we strive to provide accurate and up-to-date information, we make no guarantees regarding its completeness or accuracy. Always consult a qualified professional for advice specific to your circumstances before making any decisions.